


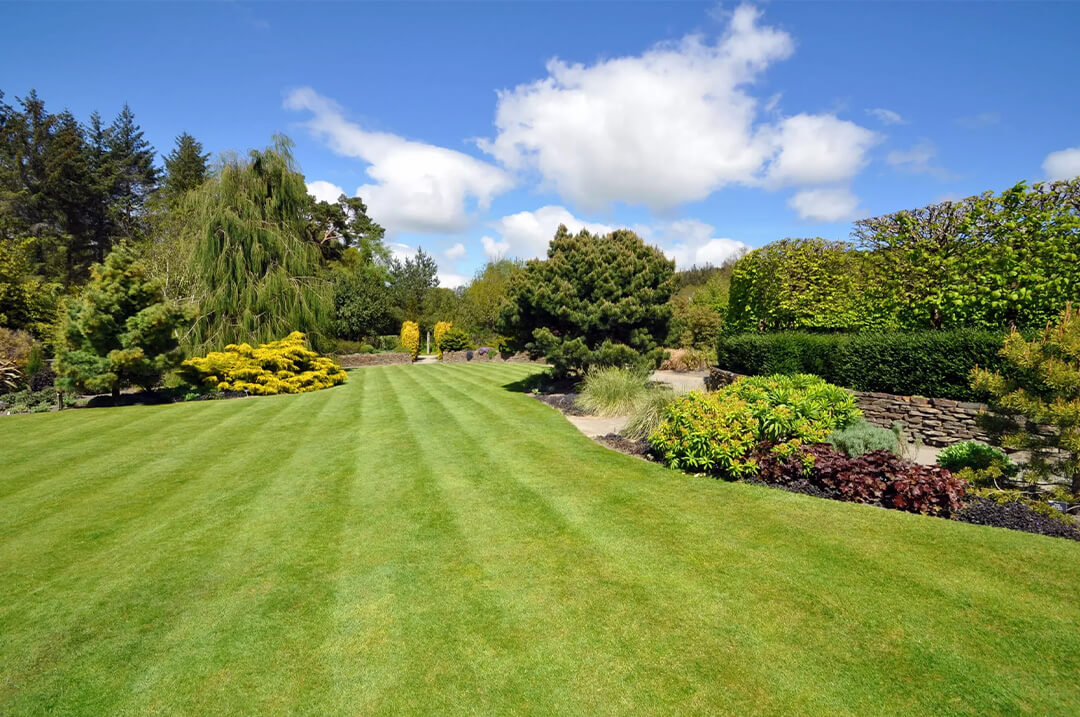


Scarifying is one of the most effective things you can do for your lawn, yet many gardeners either skip it entirely or get the timing wrong. Done properly, it removes the layer of dead material (thatch) and moss that builds up at the base of the grass, allowing water, air, and nutrients to reach the roots where they are needed most.
This guide covers everything you need to know: what scarifying actually does, when to do it, how to prepare, the step-by-step process, and the critical aftercare that turns a rough-looking lawn into a lush, dense carpet of green.
What Is Scarifying?
Scarifying (sometimes called dethatching) is the process of mechanically cutting into the surface of your lawn to remove thatch, moss, and organic debris. Unlike raking, which only works the surface, a scarifier uses vertical blades or spring tines that dig down into the base of the grass.
Think of it as a deep clean. Over time, every lawn builds up a layer of dead roots, shoots, and stems between the soil surface and the living grass blades. A thin layer of thatch (under 1cm) is actually beneficial, as it helps retain moisture and protects the crown of the grass plants. But when it gets thicker than this, it starts causing problems.
Why Your Lawn Needs Scarifying
When thatch builds up too thick, it acts like a sponge sitting on top of the soil. It holds water at the surface (rather than letting it drain to the roots), blocks air circulation, and prevents fertiliser from reaching the soil. The result is shallow-rooted, weak grass that is vulnerable to disease, drought, and weed invasion.
Moss makes the problem worse. Moss thrives in damp, compacted, shaded areas where grass is already struggling. It has no true roots and forms a dense mat that crowds out grass plants. If you have moss in your lawn, it is almost always a symptom of underlying issues: poor drainage, compaction, shade, low fertility, or a combination of these.
Scarifying tackles both thatch and moss directly, removing these barriers and giving the grass room to breathe and grow.
Benefits of scarifying:
- Removes thatch and moss that block growth
- Improves drainage and reduces waterlogging
- Allows air, water, and nutrients to reach the root zone
- Encourages stronger, deeper root development
- Reduces the risk of fungal diseases
- Creates space for new grass to establish when overseeding
- Results in a visibly thicker, greener lawn
When to Scarify Your Lawn
Timing is critical. Scarifying is tough on grass: it tears out material and leaves the lawn looking rough for a period. You need to time it so the grass is actively growing and can recover quickly.
The two best windows in the UK are:
Autumn (September to early October) - Generally the best time. Soil is still warm from summer, moisture levels are rising, and the grass has several weeks of active growth ahead before winter dormancy. Autumn scarifying works particularly well when combined with overseeding, as the warm soil and cooler air create ideal germination conditions.
Spring (late April to May) - The second-best option. Growth is picking up after winter, and the lawn has the whole growing season ahead to recover. Spring scarifying is useful for lawns that have accumulated moss over winter, and fits well within a broader spring lawn care routine. However, recovery can be slower than autumn if conditions turn dry in early summer.
When to avoid scarifying:
- Summer (June to August): Hot, dry conditions stress the grass. Scarifying in summer risks serious damage, as the lawn may not have enough moisture to recover.
- Winter (November to March): Grass is dormant or barely growing. The lawn cannot repair itself, and wet soil makes the process messy and ineffective.
- During drought: If the ground is hard and dry, wait for rain or irrigation to soften the soil before scarifying.
Signs Your Lawn Needs Scarifying
Not sure if your lawn needs scarifying? Look for these indicators:
- Spongy feel underfoot. If your lawn feels bouncy when you walk on it, thatch is likely building up.
- Visible thatch layer. Part the grass blades and look at the base. If you can see a thick, brown, fibrous layer between the green grass and the soil, it needs attention.
- Moss spreading across the surface. Patches of moss are a clear sign.
- Water pooling after rain. Excessive thatch prevents drainage, causing water to sit on the surface.
- Patchy, thin, or yellowing grass. When roots cannot access nutrients and water effectively, the grass weakens.
- Fertiliser not having the expected effect. If feeds seem to make little difference, thatch may be preventing them from reaching the soil.
As a general rule, most UK lawns benefit from a light scarify once a year and a more thorough scarify every 2-3 years.
Choosing the Right Scarifier
Your choice of tool depends on the size of your lawn and the severity of the thatch:
- Manual scarifier rake. A spring-tine rake designed for scarifying. Best for small lawns (under 50 sq m) or for light, maintenance scarifying between machine sessions. Hard work on larger areas, but gives you precise control.
- Electric scarifier. Suitable for most domestic lawns up to about 200 sq m. Quieter and lighter than petrol models, with adjustable blade depth. A good all-round choice for regular annual scarifying. Look for models with a collection box to save raking up debris afterwards.
- Petrol scarifier. More powerful and suited to larger lawns or those with heavy thatch. Heavier and noisier, but covers ground faster and cuts more aggressively. Worth hiring rather than buying if you only need it once a year.
Whichever tool you use, look for adjustable blade or tine depth. Starting shallow and gradually increasing depth gives you control and avoids tearing out healthy grass.
How to Prepare Your Lawn for Scarifying
Preparation makes a significant difference to the results:
1. Mow the lawn short. In the week before scarifying, gradually reduce the cutting height over 2-3 mows until the grass is at its lowest safe setting (usually around 2-3cm). This exposes the thatch layer and lets the scarifier work more effectively.
2. Treat moss first (if needed). If your lawn has significant moss, apply a moss killer (ferrous sulphate-based products work well) 10-14 days before scarifying. This kills the moss so it breaks up easily during scarifying rather than spreading live fragments around the lawn.
3. Clear the lawn. Remove leaves, twigs, toys, and any other debris that could snag the scarifier blades.
4. Check soil moisture. The ideal conditions are moist soil with dry grass on top. Moist soil allows the blades to cut cleanly. Dry grass reduces tearing. Avoid scarifying when the ground is waterlogged or bone dry.
5. Mark any hazards. Flag sprinkler heads, shallow pipes, tree roots, or any other obstacles the scarifier could catch.
Step-by-Step: How to Scarify Your Lawn
Step 1: Set the blade depth. Start with a shallow setting for your first pass. Test on a small area to check you are removing thatch without ripping out large amounts of healthy grass. You can always go deeper on a second pass.
Step 2: First pass. Work in straight, slightly overlapping lines across the lawn, similar to mowing. Keep a steady pace: moving too slowly can tear the turf, while moving too quickly may skip over thatch.
Step 3: Second pass (if needed). For lawns with heavy thatch, make a second pass at a 45 or 90-degree angle to the first. This cross-hatching pattern ensures thorough coverage. You may also increase the blade depth slightly for this pass.
Step 4: Collect the debris. There will be a surprising amount of material. Rake it up or use a mower with a collection box to gather it. Remove it from the lawn promptly, as leaving it will smother the grass underneath.
Step 5: Assess the results. Your lawn will look rough at this stage. Bare soil patches, thin areas, and a generally beaten-up appearance are completely normal. This is expected and temporary.
Aftercare: This Is Where the Results Come From
Scarifying opens up the lawn and creates the perfect opportunity to reseed, feed, and improve the soil. The aftercare you do in the 2-4 weeks after scarifying determines how good the end result will be.
1. Overseed bare patches and thin areas. Spread a quality grass seed mix over the scarified lawn, paying extra attention to bare patches. The open soil surface provides excellent seed-to-soil contact, and if you have timed your scarifying for autumn, conditions will be ideal for germination. Use a seed suited to your conditions: our overseeding mixes are designed specifically for this purpose. For a full walkthrough of the reseeding process, see our guide on how to reseed a lawn.
2. Top-dress with a fine soil or sand/loam mix. A light topdressing (2-3mm) over the seeded areas protects the seed and retains moisture. Work it into the grass with the back of a rake or a stiff brush.
3. Apply a seasonal lawn fertiliser. A good feed gives the grass (and any new seedlings) the nutrients it needs for rapid recovery. In autumn, use an autumn/winter formulation that is higher in potassium to strengthen roots. In spring, a balanced feed with nitrogen will fuel green growth.
4. Water thoroughly. Immediately after scarifying, overseeding, and feeding, give the lawn a deep watering. Continue to water regularly (especially if overseeding) for the next 2-3 weeks to keep the soil consistently moist.
5. Stay off the lawn. Minimise foot traffic for at least 2-3 weeks to give the grass and any new seedlings time to establish.
6. Delay mowing. Wait until the grass (including new seedlings) reaches about 5-7cm before the first cut. Set the mower high for the first few mows and gradually reduce the height over subsequent cuts. For more on germination timelines, see our guide on how long grass takes to grow.
Recovery Timeline
Your lawn will look worse before it looks better. Here is a rough timeline of what to expect:
- Week 1: The lawn looks rough, thin, and patchy. Bare soil visible. This is normal.
- Weeks 2-3: New seedlings begin to emerge (if overseeded). Existing grass starts to fill in.
- Weeks 4-6: Noticeable improvement. Grass is thickening, bare patches are filling, and colour is returning.
- Weeks 8-12: Full recovery. The lawn should be visibly denser, greener, and healthier than before scarifying.
In autumn, the recovery period tends to be quicker due to the warm soil and consistent moisture. In spring, it may take slightly longer depending on weather conditions.
Common Mistakes to Avoid
- Scarifying at the wrong time. This is the number one mistake. Scarifying in summer or winter when the grass cannot recover will cause more harm than good.
- Going too deep too quickly. Start shallow and increase depth gradually. Ripping out too much healthy grass in one pass sets recovery back significantly.
- Skipping the aftercare. Scarifying without overseeding, feeding, and watering is a missed opportunity. The aftercare is what transforms the results.
- Scarifying a brand new lawn. Young lawns (under 12 months old) are not established enough to handle scarifying. Wait until the lawn has been through at least one full growing season.
- Not treating moss first. If you scarify a mossy lawn without killing the moss first, you risk spreading live moss fragments around the lawn, making the problem worse.
Summary
Scarifying is one of the most impactful lawn care tasks you can carry out. By removing the suffocating layers of thatch and moss, you create the conditions for stronger roots, denser growth, and a lawn that can outcompete weeds and handle seasonal stress.
The keys to success are: timing it right (autumn is best, spring is second choice), preparing properly, following the step-by-step process, and committing to thorough aftercare with overseeding, feeding, and watering. Do this, and your lawn will reward you with the kind of thick, green finish that makes the effort worthwhile.


